This part introduces Android book app maker personal menu. (After each option, you can see its hot key prompt.)
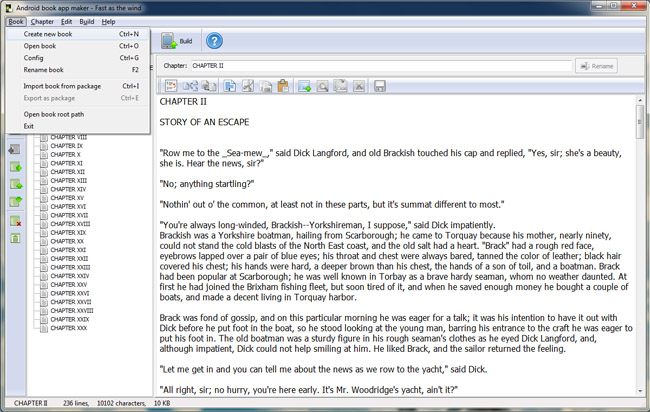
1 Book
<1> Create new book: click it to create a empty new book.
<2> Open book: open list of the created books.
<3> Config: enter in the panel of book basic setup.
<4> Rename book: rename current book.
<5> Import from package: import the exported .abp project for continuous editing.
<6> Export as package: export the editing book as a package file suffixed .abp.
<7> Open book root path: Check out the original directory of current book app.
<8> Exit: exit Android book app maker personal.
2 Chapter
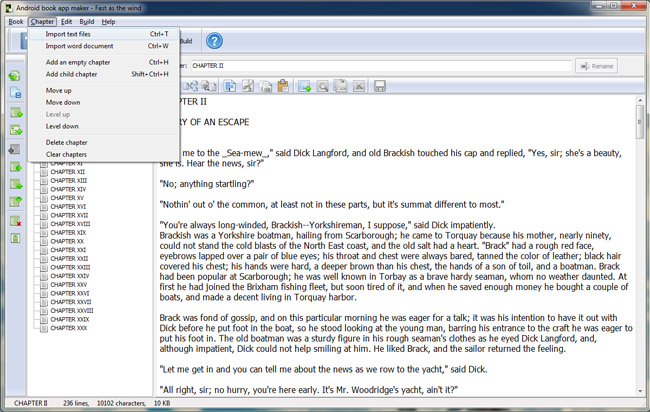
<1> Import text files: batch create chapters through import text files, each file as a separate chapter.
<2> Import word document: import word files as new chapters.
<3> Add an empty chapter: add an chapter for empty book.
<4> Add child chapter: Add child chapter for the current selected chapter.
<5> Move up: select any chapter and move up for sorting chapters.
<6> Move down: similarly move any chapter down. (The order will be built in the output book app.)
<7> Level up: make the child chapter as a parent chapter.
<8> Level down: make the parent chapter as a child chapter.
<9> Delete chapter: click any chapter in the left list to select it and delete.
<10> Clear chapters: remove all the chapters.
3 Edit
<1> Remove non-paragraph: remove line breaks make it a whole paragraph (not separated by line feed) aim at English and other language whose participle depends on blank space.
<2> Divide chapter: select a chapter and divide it into multiple chapters.
<3> Extract as new chapter: extract the select text as a new chapter.
<4> Select all: select all the content in current editing panel, you will find the content highlighted blue.
<5> Cut: select part of content in the editing panel and then cut.
<6> Copy: select part of content in the editing panel and then copy.
<7> Paste: paste the content you copyed in the editing panel.
<8> Add image: insert image to the book.
<9> View image: select the image text to view the image.
<10> Replace image: replace the current image with another one.
<11> Remove image: remove the image.
<12> Save: save the changes of content.
4 Build

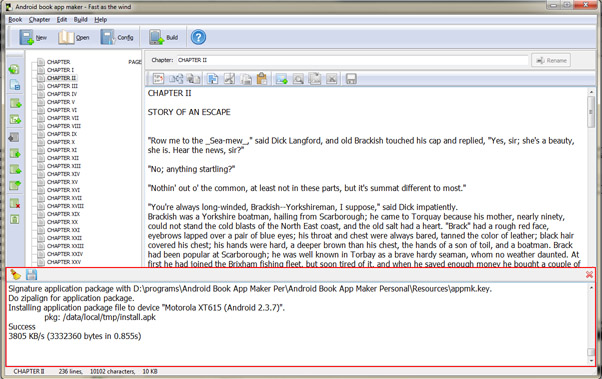
Build: Connect your PC with Android device, the eBook app will install on the Android device automatically. More details on Build Book APP.
5 Help
<1> Help: open Android book app maker manual to obtain more detailed guidance.
<2> About: version code and license information.
<3> Contact us..: through it, you can visit support page and then contact us support team.